Endurance Chip, Speed Chip, and Strip ChipUpdated 3 months ago
What are the advantages of using Endurance Chip and Speed Chip?
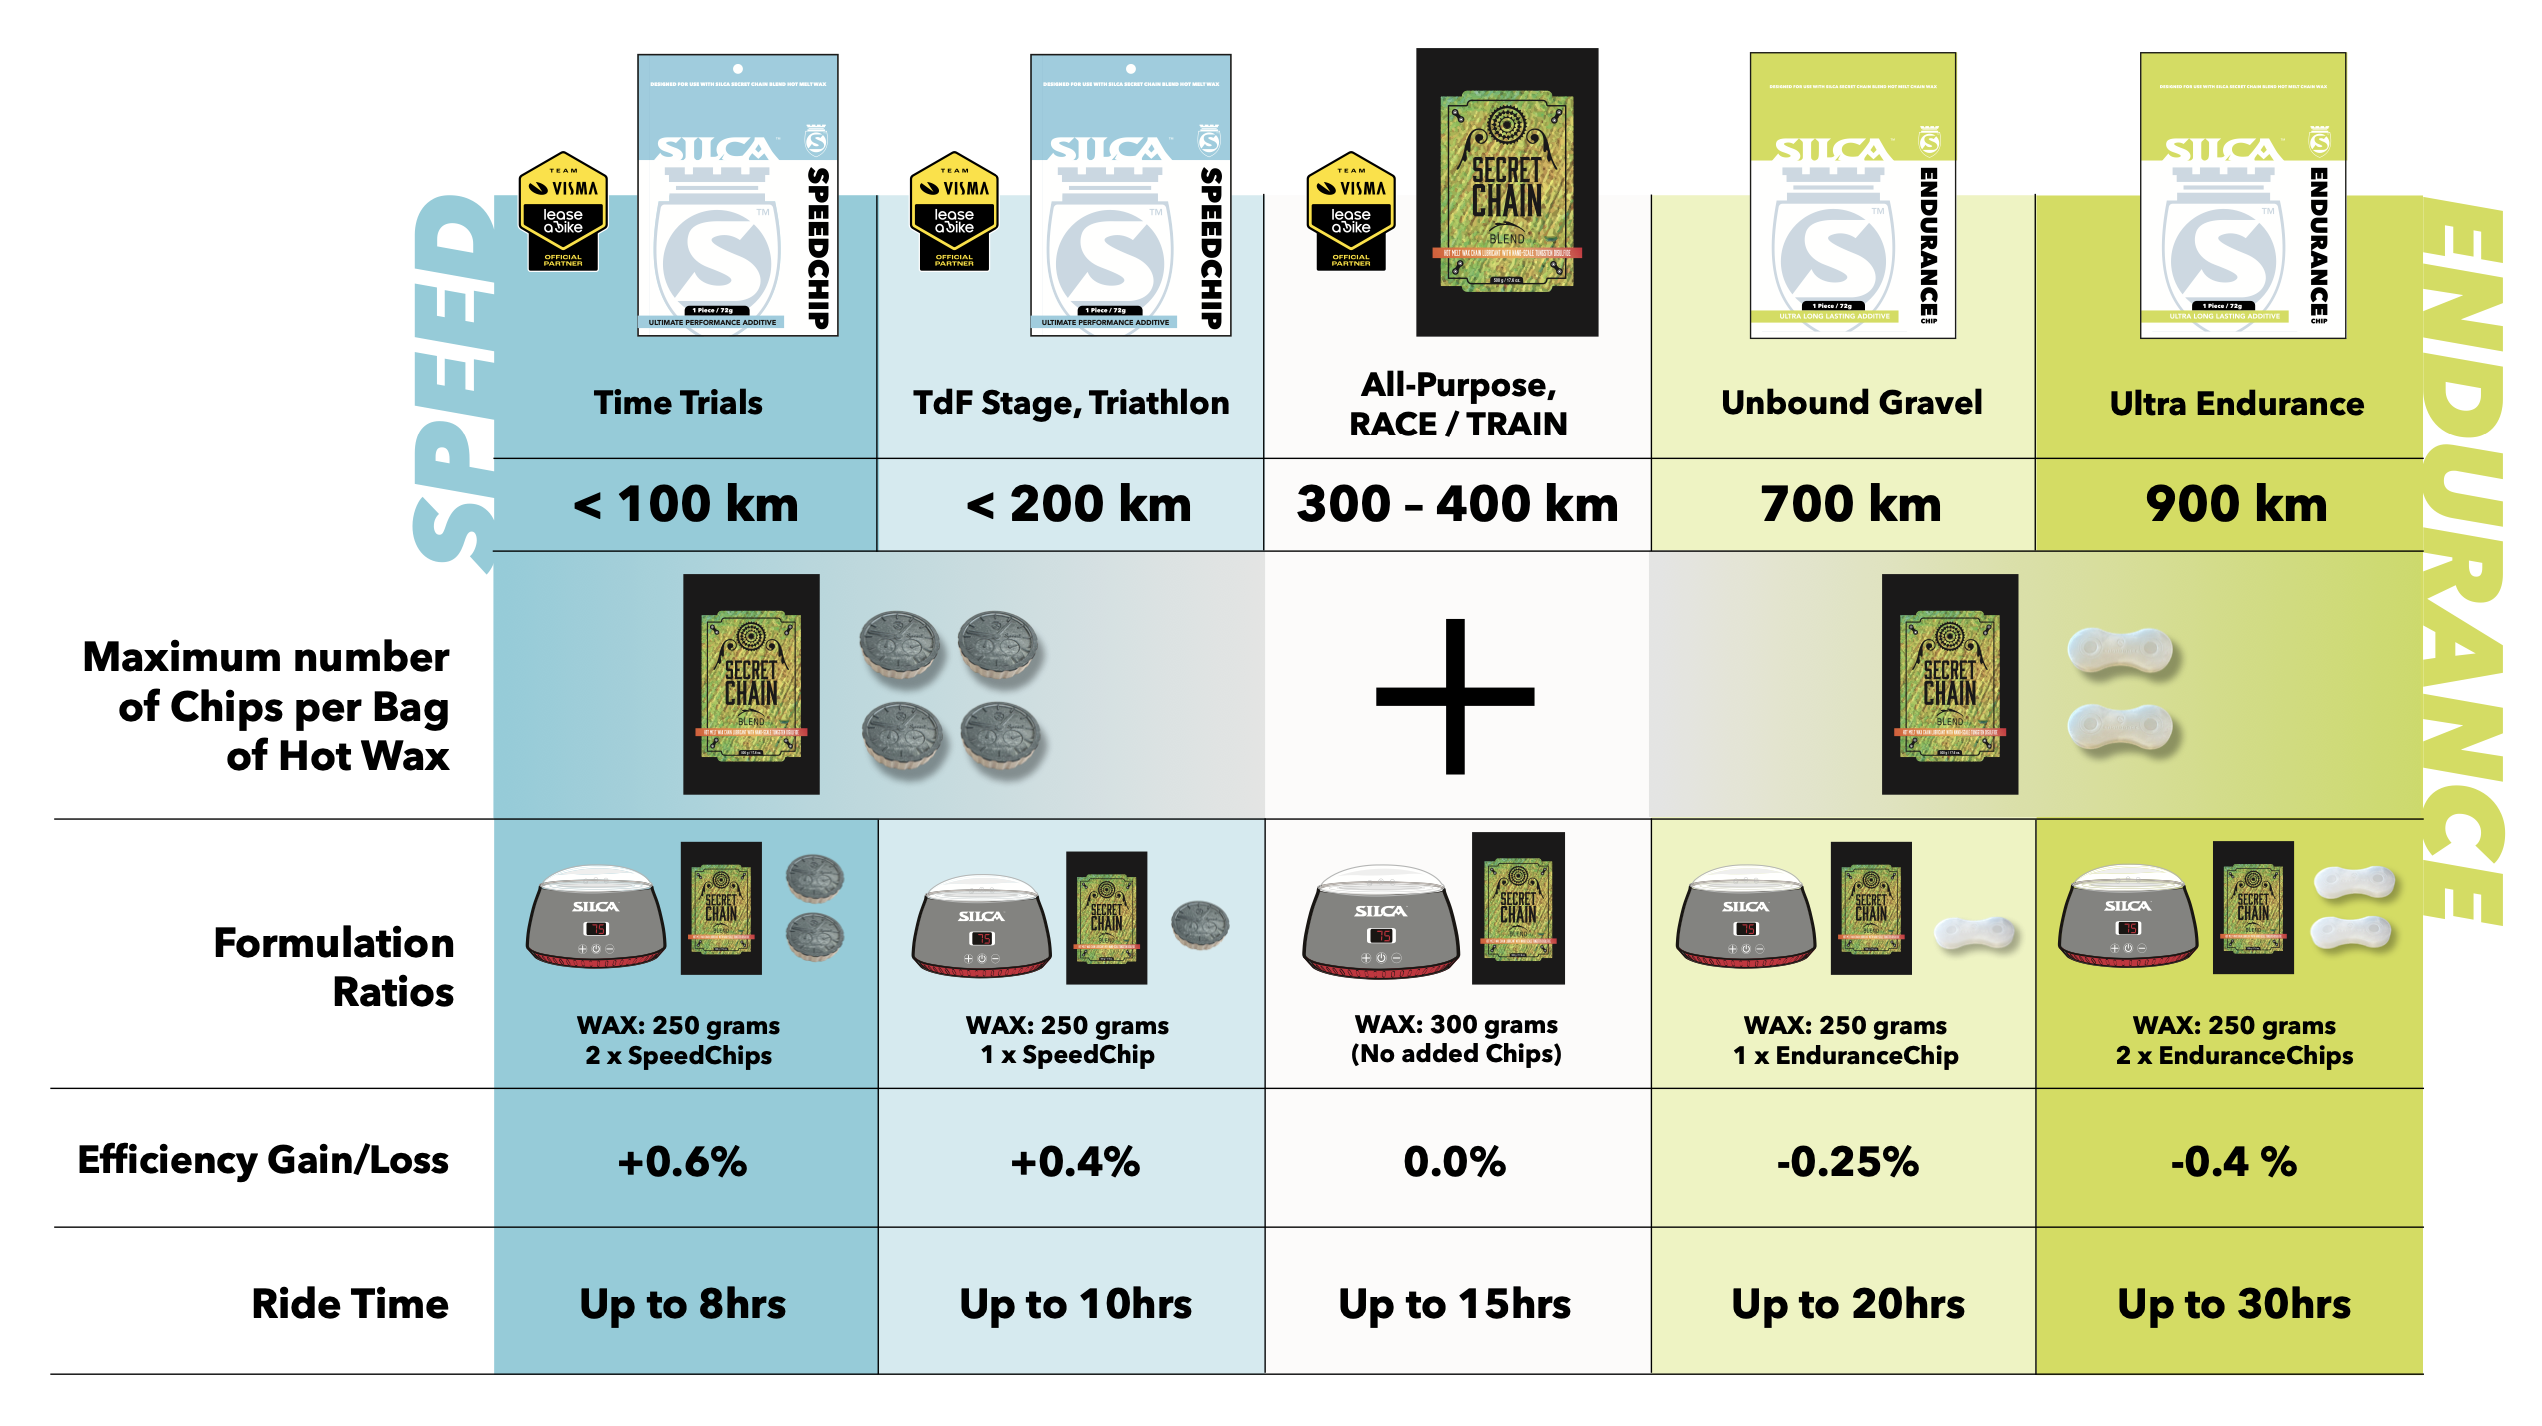
Endurance Chip and Speed Chip are our wax blend additives that allow each rider to customize their wax blend to fit their specific needs. If you are a rider who is looking to get more distance ridden between waxings, Endurace Chip was made for you! If you are a rider who is looking to maximize your speed and efficiency, Speed Chip is for you! Please see the chart below for information on the performance of these addatives:
If you have any questions about what specific mix will work best for you or any events that you may be participating in, please reach out to us, and we will do our best to provide you with a customized recommendation.
How to Use Wax Additives
Once you add Speed Chip or Endurance Chip to your wax pot once, any wax in your pot will have the advantages of this chip for all future waxings. All of our wax additives may be used at the same time in the same pot of wax. If you are using multiple additives in your blend, please follow the heating instructions for the additive with the highest required temperature.
Endurance Chip: 95C
Speed Chip: 75C
Strip Chip: 125C
See Strip Chip Specific Instructions Here
7. Once the temperature reaches 75°C (about 10 more minutes), it is safe to remove the chain from the wax using the cable coupler and place it on the Chain Waxing System drip stand to dry.
8. Allow 10 to 15 minutes of cooling/drying time before attempting to handle and install the chain on your bike.
9. The chain will be stiff with the cooled, hardened wax. It is easier if you articulate each link, breaking them free before installing it on the bike.
10. Depending upon the environmental conditions, you will need 10 to 20 minutes of pedaling to break in the new chain with the rest of the components of your drivetrain. There may be some wax flaking from the exterior of the chain during this process. If not riding outside, place a towel under the bike to capture this bit of excess wax and facilitate clean up.
Note: In cold environments, it is quickest to break in a normal ambient room temperature chain (i.e., not a cold chain).